

With the dark specter of winter looming over the country side, if you are like me, your thoughts turn to that long list of projects that I never got to last year. From the simple less than a day project to those that will take several days, we all have to do projects that we have either failed to complete or failed to start. Don’t feel bad about, we all have these skeletons in our closets, but is the time to do something about it.
There is something inherent to being a “Prepper” that means we all plan. This is one characteristic that we all share within this community. Some of us are more detailed than others, some of us develop schedules to keep ourselves on track and still others tend to look at the big picture and tackle to issues and projects that seem the easiest to complete at the time. However, most of the “Bigger” projects tend to need planning to execute and the cold winter months are great times to get this done.
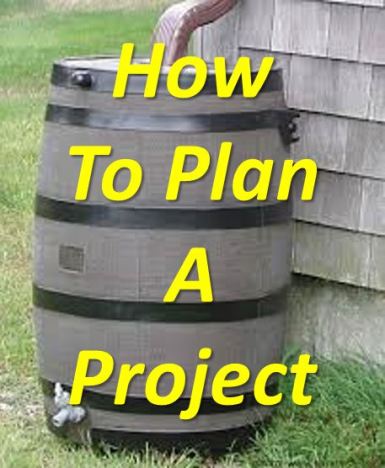
There are several books out there on “How To” plan large projects however, I have found if you simple divide the project in to a logical sequence of events if will not only help to ensure that your project will be completed, but will also save you time, money and heartache. Let’s take a look at a simple water catchment system and how this simple planning method will work.
Step 1. Select a Project. I know this may sound a little silly, but some people have a real hard time focusing on one thing at a time. They tend to begin with all the best intentions but somewhere down the road they get sidetracked on to something else, and before you know it they have a half a dozen unfinished projects at various stage of completion and no starting points. The simple act of selecting a project and writing the name of the project down on a piece of paper will help keep you focused on the project.
So I have named my project “Water System”.
Step 2. Budget. I always like to start out trying to develop a budget for this type of project. Let’s face it, all of us are concerned about money and developing a budget and trying to stick to it will help ensure not only this projects success, but also your next several projects. Often we tend just to throw money at an issue, much like the government. In doing so, we have about as much success as the government has with their projects. Delays, over spending and failure are often the result of this practice.
By developing a budget it will help us develop an estimate on cost for the project and it also helps define the schedule for the project. If the project is really large, we may not have enough cash on hand to purchase all the required materials at one time. Some of the materials may take months to obtain. Knowing this up front will assist in the next planning step of scheduling.
The “Water System” project is relatively a low budget project. After spending a couple of minutes checking out a couple of websites I have developed to following simple budget for this project:
| Item | Cost |
| 55 gallon barrel, blue, used | $18.00 |
| Gutter elbows, 2 each | $7.36 |
| Gutter piece straight (8 ft) | $15.00 |
| Downspout Filter System | $56.99 |
| Drain Spigot (Barrel) | $27.82 |
| Caulk, 2 tubes | $7.00 |
| Total | $132.17 |
So, in just a couple of minutes I came up with a budget of $132.17 total for this project. Not bad, but not great. I bet there will be some areas we can cut a dollar or two from the budget, but if not, so be it. At least we have an idea of what it should cost.
Step 3. Schedule. As simple as this sounds and may appear, scheduling is the part of the overall project that gives most of us the most trouble. We often will look at a project and just give it an idealistic estimate of our time based on everything going right the first time. As we all know this almost never happens. There are several different issues that can and often will affect our project schedule. These issues range from our skill level to weather. Most of these issues can be minimized with a little planning, however there are several that are not.
A simple schedule that includes the identification of general task and an estimate of time that these task will take to complete should provide a fairly close estimate of time. Below is our schedule for this project.
| Task | Time | Day |
| Design System | 2 hours | 1 |
| Go to X & pick-up barrel | 2 hours | 2 |
| Go to Lowes, Pick-up supplies | 1 hour | 2 |
| Project layout | 1 hour | 3 |
| Cut Gutter | 30 minutes | 3 |
| Install Drain Spout in Barrel | 1 hour | 3 |
| Set Barrel | 30 minutes | 3 |
| Install Gutter Pieces | 30 minutes | 3 |
| Install Water Filter | 30 minutes | 3 |
Based upon the simple schedule we developed above, we can see that it should take roughly 3 days for us to complete this project from beginning to end. However, if one of the uncontrollable factors raises it head it may take a day or two longer than we have scheduled. Also, you will notice that we have also identified what day we want to complete these task on. We could, if required, combine the days that the task are completed. This will speed the total time the project requires. This will also allow us to stop work on the project and comeback to it giving us a good start and stop point.
Remember, your schedule can be detailed as you what to get. However, the more detailed you get, the most accurate the schedule will be.
Step 4. Execution & Adjustment. This is the step we are all the most familiar with. Building or execution of the project is the sometimes the easiest step overall. Other times it can be the most difficult. If we are lucky the project will come together without any glitches however, more often than not there will be an issue. If a glitch or an unplanned for issue arises sometimes this will cause an adjustment in Budget and Schedule. If we have developed a well thought out plan and identified all the steps required to complete the project, then the occurrence of issue or glitch in no big deal. We simply make the required adjustment and continue to execute the plan.
Step 5. Close-out. No matter what type of project you do, Close-out is always a part of it. There is always tools to be put away, receipts to be filed or contact list to be updated. Close-out not only signifies the conclusion of the project, it can also give us direction to another project. We often close-out projects without even thinking about what is actually occurring. A good idea during close-out is to make a list of issues that occurred during the project. You can take this list and work to develop other courses of action so that the next time you run into the same of similar issues you will be able to adjust your actions.
No matter if you’re putting away tools, filing or updating those contact list, a good close-out will assist with other projects down the road.
It was Ben Franklin who said that “If you fail to plan, you are planning to fail”. If you really set down and think about it, you will undoubtable agree. Almost every action and step we take in life can and often is made easier with a little planning. If you have a half hazard approach a project, those are the kind of results you can expect. However, with a little plan you increase the odds of your success.
![]()

great points altogether, you just won a brand new reader.
What would you recommend in regards to your publish that you made
a few days in the past? Any certain?
LikeLike